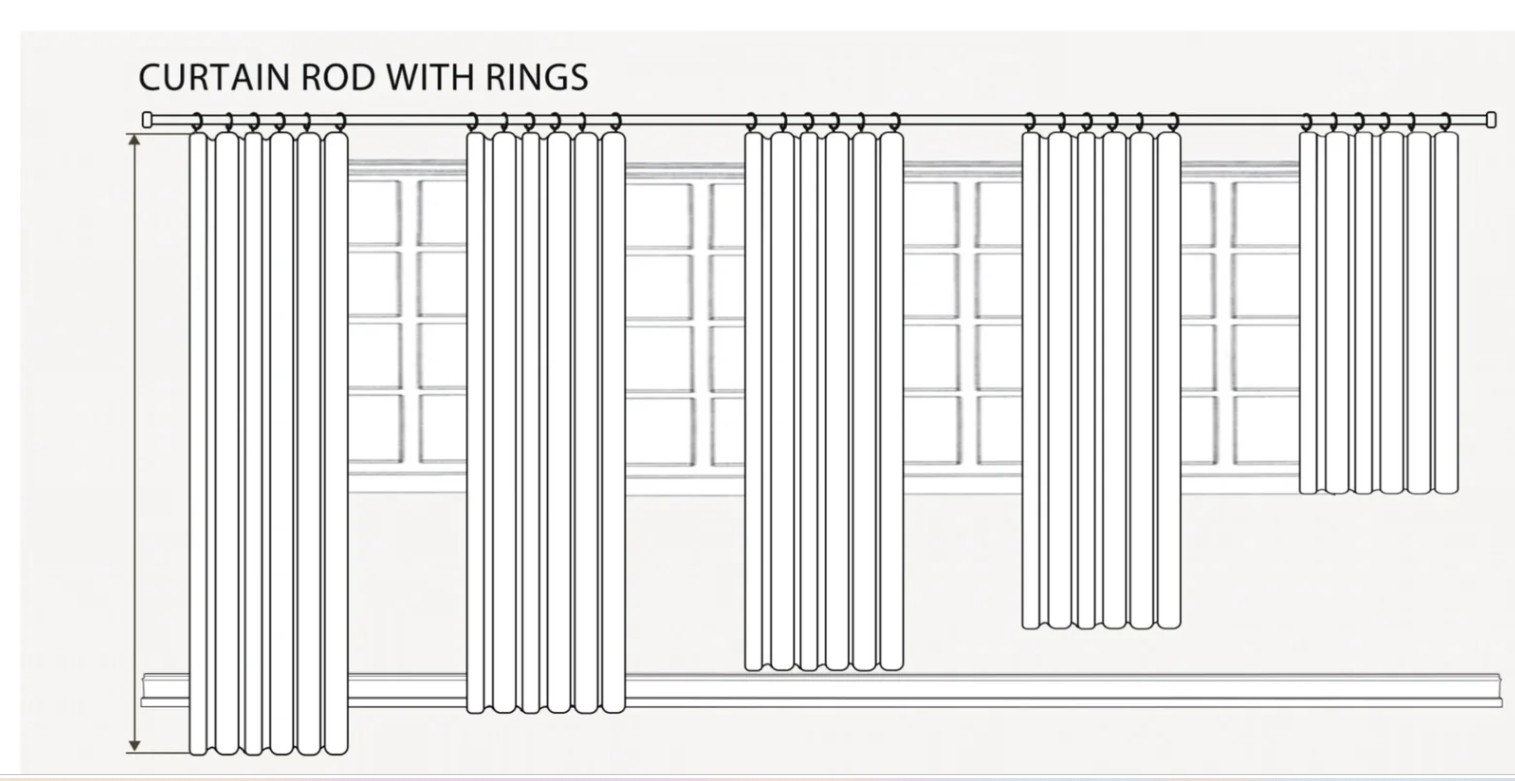
Measuring Instruction | TWOPAGES Curtains
Measuring Curtains
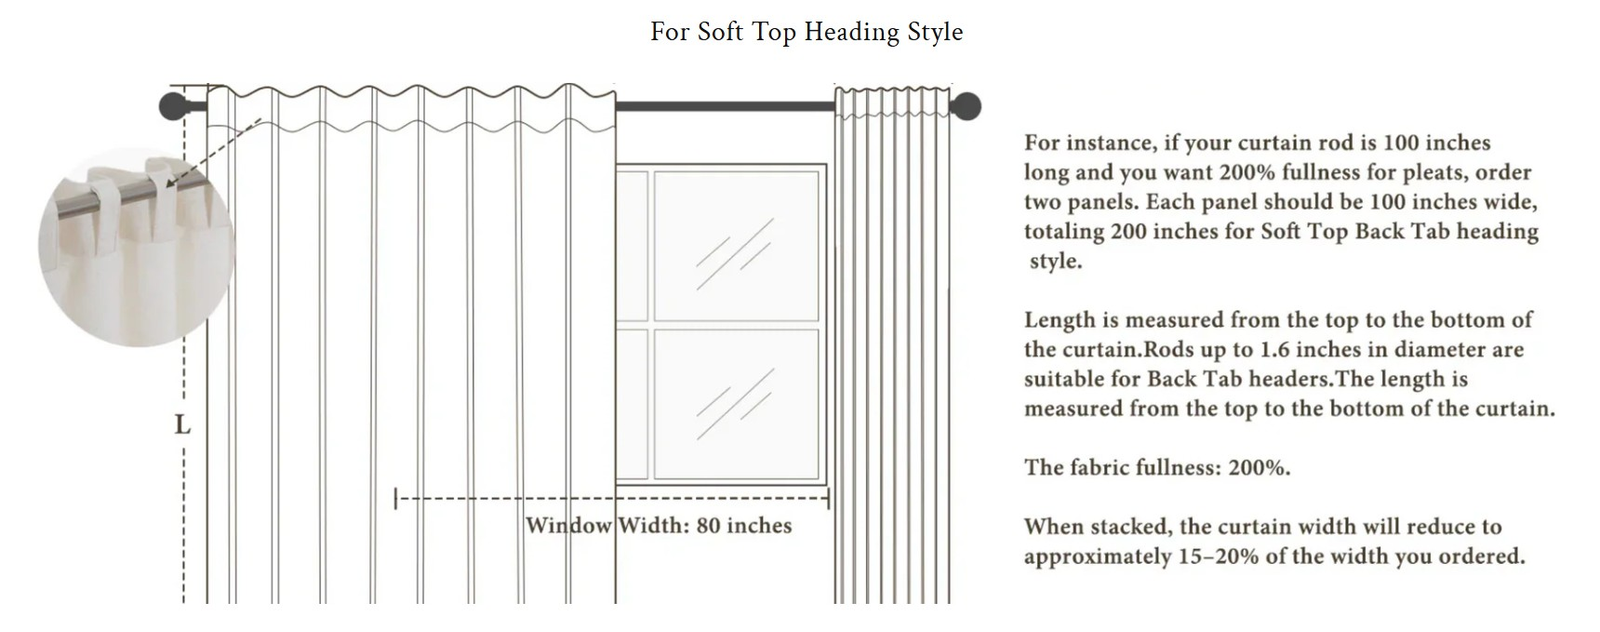
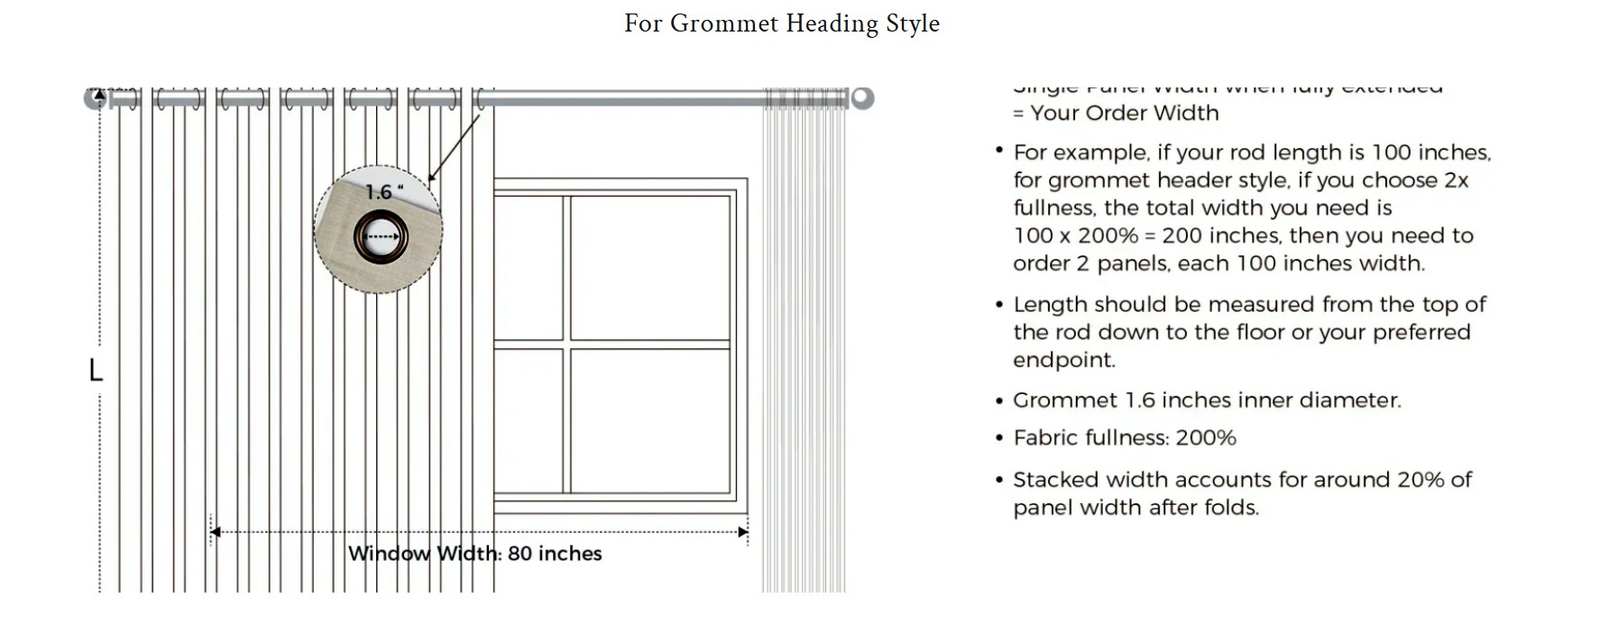
Grommet, Rod Pocket, Back Tab, Tab Top, and Flat Panel
Measure Your Window/ Patio Door
Rod already installed
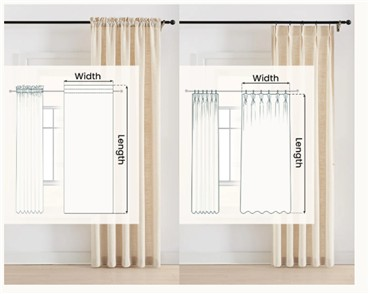
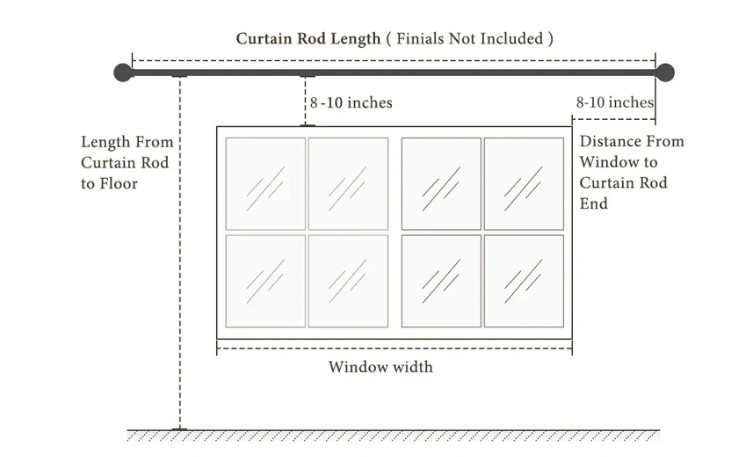
- Width: Measure rod length (measure the distance between the decorative ends of the drapery rod)
- Length:
- Normal Length: From top of the rod to about ½ - 1" above floor
- Puddle Length: From top of the rod to floor + 3-4"
New Rod Installation
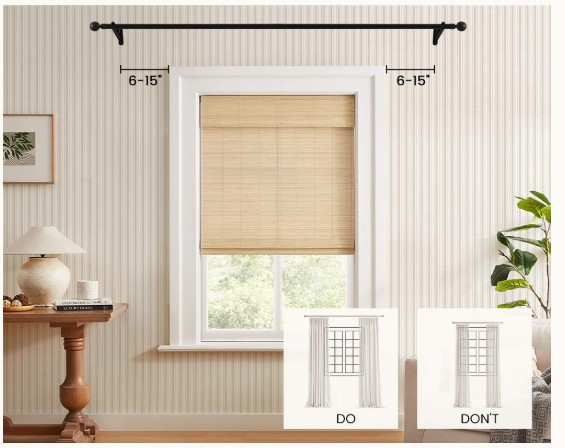
- Width: Add 5-15" to the window frame width on both sides. (Add more if you need setback – See notes below)
- Length:
- Install the rod 6-8 above the frame (recommended - longer curtains gives a richer spacious look)
- Normal Length: From top of the rod to about ½-1" above floor
- Puddle Length: From top of the rod to floor + 3-4"
- Curtain Stack back – For whole window view increase width from above as needed in advance.
- 5-15" rod extending beyond frame limits the light from sneaking in.
- Curtains may extend 1" - 2" above rod
- 2.1X fullness is standard (2X fullness means if window width is 40" then the curtain will be 40 x 2 = 80")
- Curtains may have vertical seam/s, depending on width
Curtain Panel Splitting
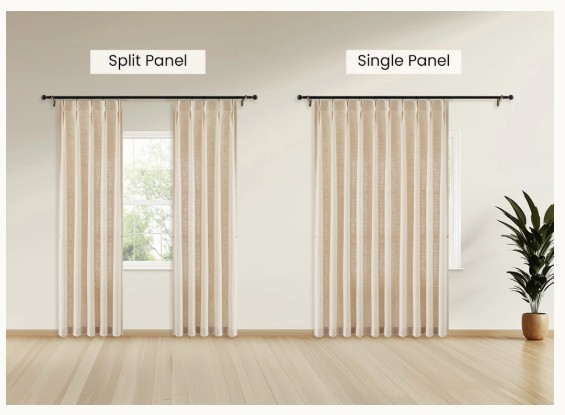
Above curtains may be divided into two equal panels for opening in the middle.
A single piece of curtain can be opened to the left or right of window. Are sometime used as normally closed curtains.
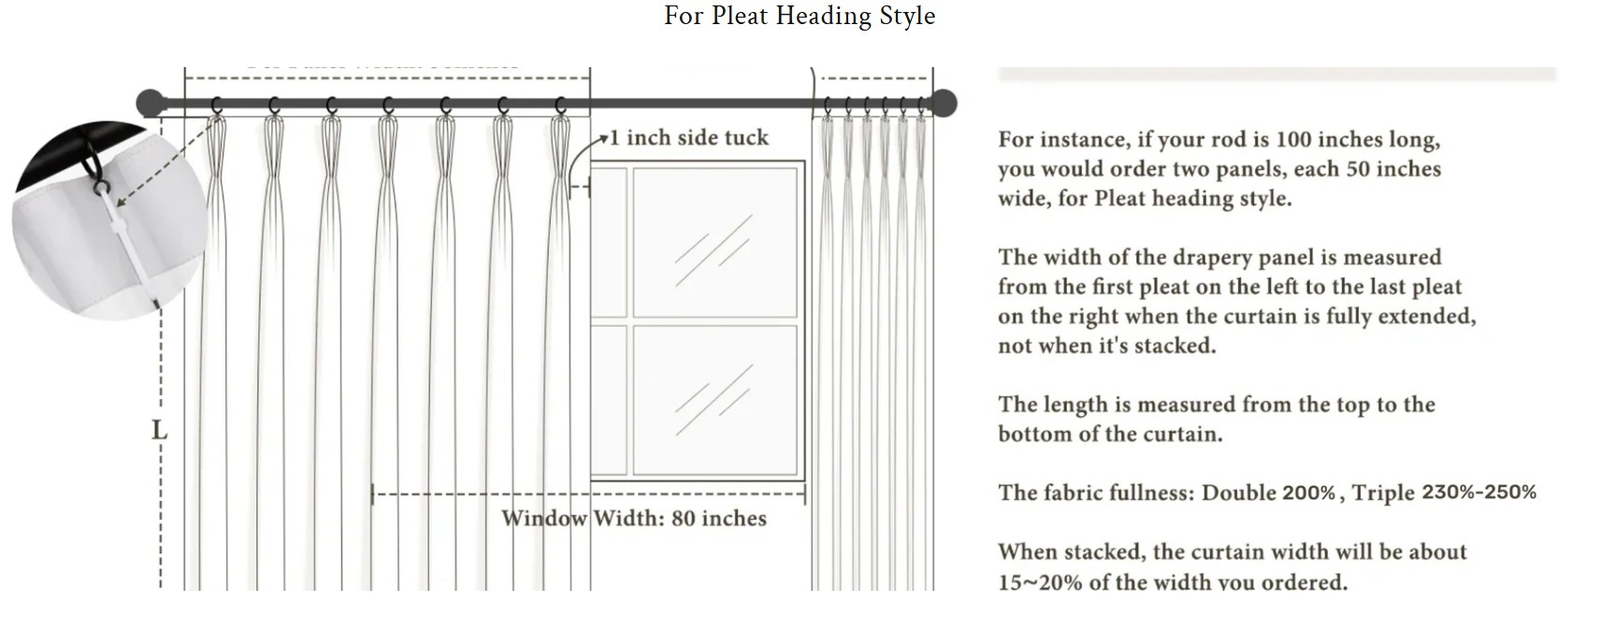
Pleated Top (Pinch Pleat - Double/Triple, Euro Pleat - Double/Triple)
Measure Your Window/ Patio Door
Track already installed
- Width: Measure track length
- Length:
- Normal Length: From where you want top of the curtain to be about ½ - 1" above floor. Hook will be about 1" below the cloth top.
- Puddle Length: From where you want top of the curtain to be to floor + 3-4"
New track Installation
- Width: Add 5-15" to the window frame width on both sides. (Add more if you need setback – See notes below)
- Length:
- Normal Length: From where you want top of the curtain to be about ½ - 1" above floor. Hook will be about 1" below the cloth top.
- Puddle Length: From where you want top of the curtain to be to floor + 3-4" (Recommended - longer curtains gives a richer spacious look)
- Curtain Stack back – For whole window view increase width from above as needed in advance.
- 5-15" rod extending beyond frame limits the light from sneaking in.
- Curtains may extend 1-2" above rod
- About 2.1X fullness is standard (2X fullness means if top width is 40" then the bottom width of the curtain will be 40 x 2 = 80")
- Curtains wider than fabric will have nice vertical seam
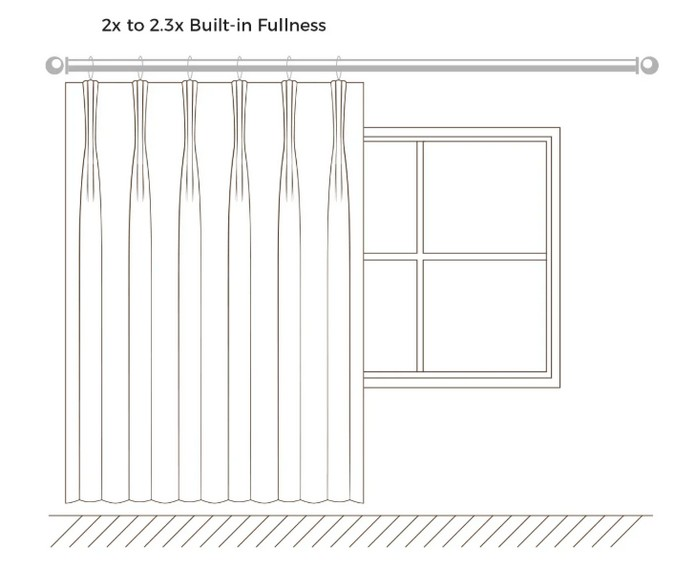
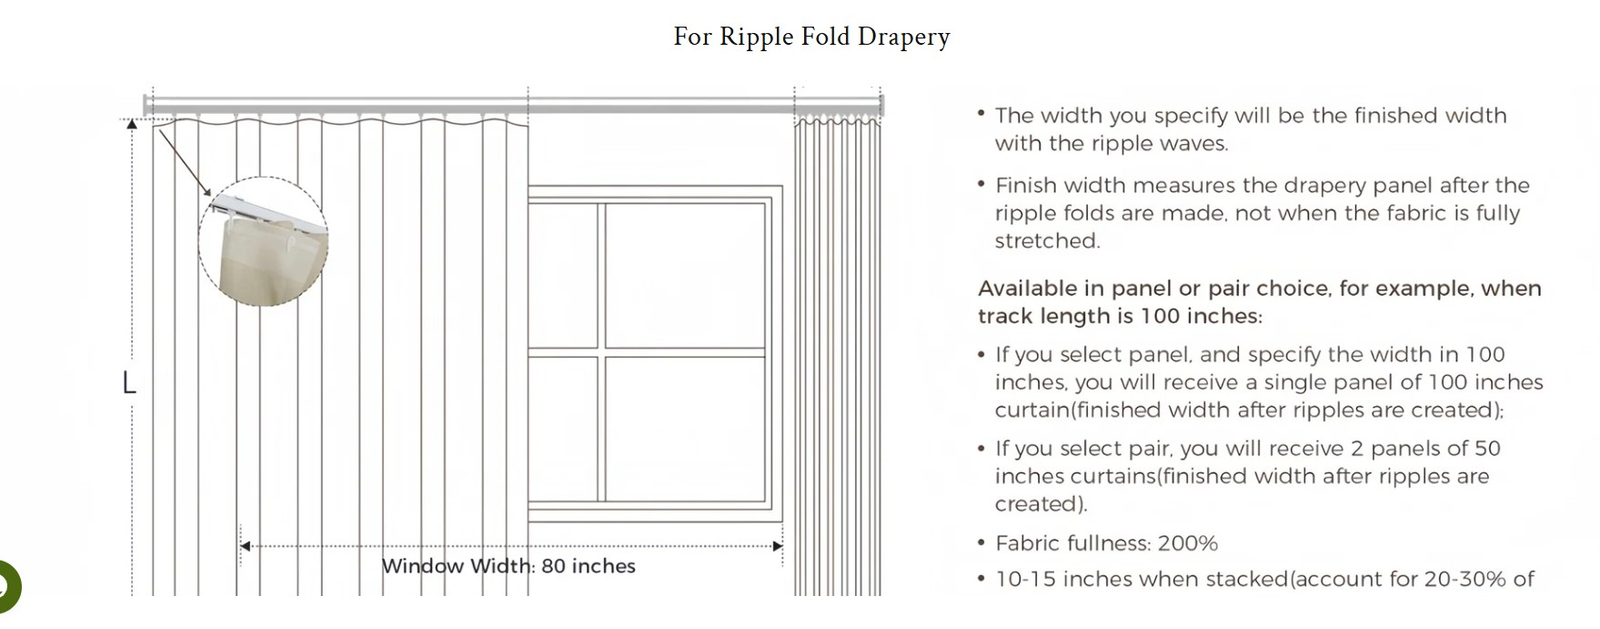
Ripple fold
Measure Your Window/ Patio Door
Track already installed
- Width: Measure track length
- Length:
- Normal Length: From where you want top of the curtain to be about ½ - 1" above floor. Hook will be about 1/2" below the cloth top.
- Puddle Length: From where you want top of the curtain to be to floor + 3-4"
New track Installation
- Width: Add 5-15" to the window frame width on both sides. (Add more if you need setback – See notes below)
- Length:
- Normal Length: From where you want top of the curtain to be about ½ - 1" above floor. Hook will be about 1/2" below the cloth top.
- Puddle Length: From where you want top of the curtain to be to floor + 3-4" (Recommended - longer curtains gives a richer spacious look)
- Curtain Stack back – For whole window view increase width from above as needed in advance.
- 5-15" rod extending beyond frame limits the light from sneaking in.
- Curtains may extend 1-2" above rod
- About 2.1X fullness is standard (2X fullness means if top width is 40" then the bottom width of the curtain will be 40 x 2 = 80")
- Curtains wider than fabric will have nice vertical seam
- Ripple Fold Styles:
- Belt Hook Type: uses a series of small hooks attached to a belt or strap sewn onto the curtain fabric.
- Tape Buckle Type: use fabric tapes that are sewn into the top of the curtain panels.
Glossary
Curtain Fullness
The ratio between fabric coverage width and the width you wanted to cover over your curtain track or rod. When curtains are crafted with more fabric amount for extra fullness, they create pretty waves gathering at the top.
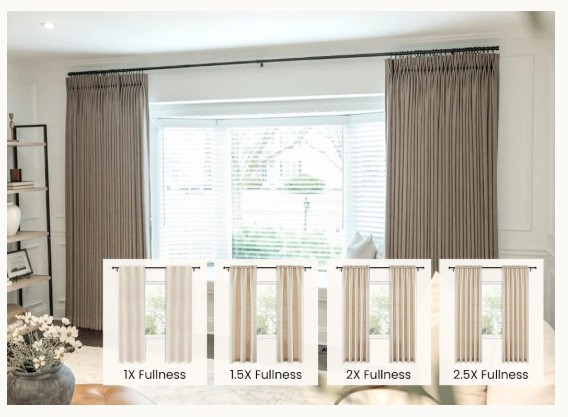
Completely flat.
Not full enough unless you are just covering the window and never shutting the curtains.
Being practical for a nice pleated look.
Features a lush look full of rich pleats. Sheer curtains live out loud with this style.
- If you use a 42" w panel to cover a 42" w area, which is a 1x fullness, the curtains will look extremely flat.
- If you go for an 84" w panel to cover the same area, making a 2x fullness. The curtains get a charming wavy look instantly.
Curtain Bottom
Curtain length. A style of how curtains drape down with different lengths.
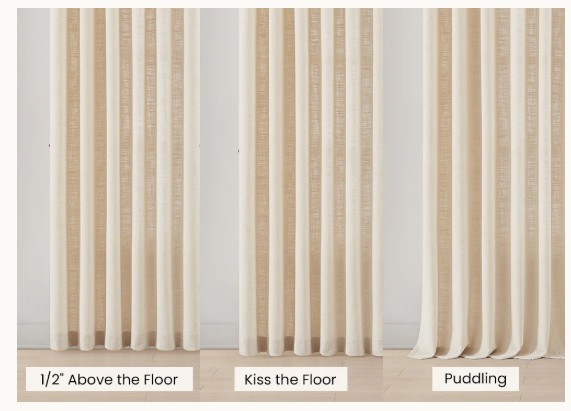
1/2" off the floor. Crisp look. Easier to vacuum without too much dust, fur, and debris sticking to them. A great choice for busy families.
Floor length, brushing the floor with a streamlined effect.
2-4" puddling on the floor. Allowing your drapes to sit with a crease, not just hang straight. It is not recommended for curtains that open and close regularly, as they pick up dust quickly.
Curtain Stack Back
A word that refers to the drape width that curtains stack at each side of the window frame when they are fully open.
Please note that stack back width is roughly calculated. It may vary due to the bottom, fabric, lining, and other curtain hardware.
For more details on the stack back of the curtain, please read this page.
Recommendations and Limitations
Fullness:
Fullness is extra fabric across the width of the drapery to provide a richer and fuller look. It increases light and sound absorption.
Important Notes:
- Panels ordered wider than fabric width will have a vertical seam added.
- Please read measurement instructions carefully.
- Sheer fabrics will be unlined.
- Should you not choose a liner, the colour of the drapes will be visible from the exterior/street.
- Should you choose a liner, the liner colour will be visible from the street.
- If standard light filtering liner is chosen, white fabrics will come standard with white liner.
- Blackout liner comes standard either white or ivory liner colour.
- Final length will be measured from the upper inside of the grommet to the floor (No deductions).
- One tieback included (when ordered), and will match your grommets and attach to your wall.
- Grommet width is 1 1/2" in diameter. For best results, we recommend hanging from rod 1-1/4" in diameter.
- Depth of wave fold pleats are 1 1/2" - 1 3/4".
- 1 inch from inside top of grommet to top of drapery.
Size of tiebacks:
- Curtain <70" wide: 25.5" tieback.
- Curtain 70-100" wide: 35.5" tieback.
- Curtain >100" wide: 33.5" tieback.
Care & Additional Information:
- If your drapery arrives slightly wrinkled, you can smooth the drapes easily with a garment steamer. Please be careful to avoid direct contact with the fabric. Most wrinkles will relax and smooth out over the first week.
- Fabric colour can vary from one dye lot to another. To ensure that all materials are from the same dye lot, please order drapery for the same room at the same time.
- Dry-clean only.
- Hardware not included
STRANGULATION HAZARD — Young children can be strangled by cords. Immediately remove this product if a cord longer than 22 cm or a loop exceeding 44 cm around becomes accessible.
You don't need to add extra width for fullness, just choose the width you want.
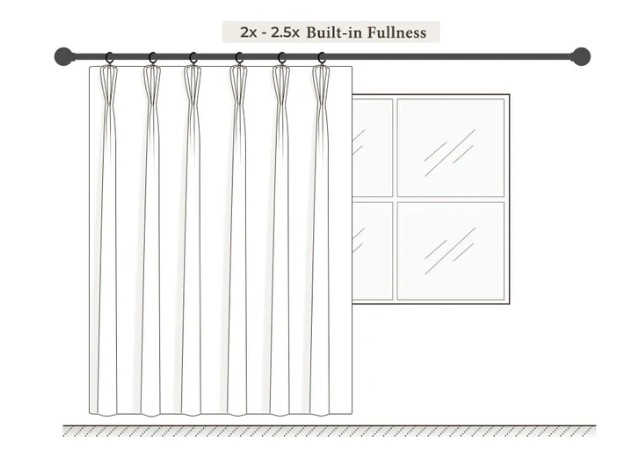
For Pleat Heading Style